Sunshine Day Crochet Blanket

On the 22nd September my good friend, great boss and Australian stand in mother turns 70 and I really wanted to give her an extra special present. I searched the shops, local markets and internet and couldn't come up with anything extra-special so six weeks ago I decided that I'd crochet her a beautiful blanket. This in turn sent me searching through my crochet books and ravelry, I wanted a pattern that was different, kind of complicated - but not too difficult - and really pretty to look at.

After a couple of sleepless nights and frantic days I started to believe that I'd never find that "perfect" pattern. Then I came across this "Sunshine Day Blanket" pattern and instantly fell in love with it. There's just something very special about this pattern.

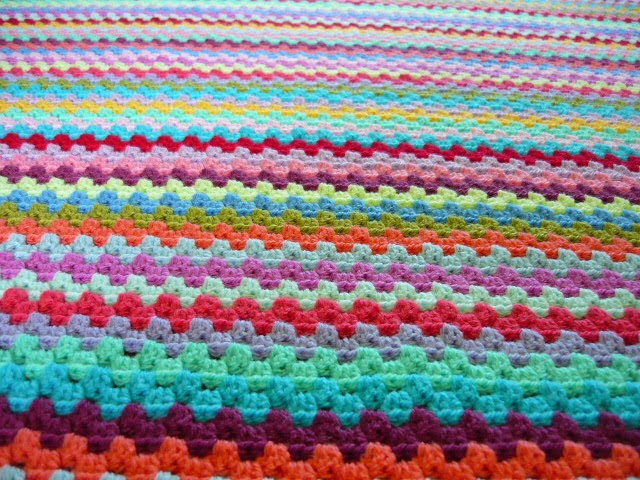
I started by picking my yarn. I used Stylecraft Special DK and wanted to use the silver as the predominant colour.
I wanted to use a mixture of quite neutral tones and chose Sherbet, Cloud Blue, Denim, Stone, Mocha, Meadow, Lemon, Soft Peach and White.
Then I added three bright colours for excitement, which were, Turquoise, Citron and Fondant.

It took me a couple of days to find my rhythm with this pattern and to be honest there was a moment when I almost gave up. But I couldn't find another pattern that I felt was good enough for my lovely friend. So I persevered.

And my piles of squares quickly grew. I set myself the deadline that it must be in the mail by the 14th September at the latest, which meant that I had a daily target of 6 squares a day. When I set this target the making of these squares became a love/hate thing, and some nights after a day of work then coming home and cooking it became a chore for me and I really didn't want to pick up the hook. Then I would love making them and make 18 in one day. As the piles grew, so too did my motivation.

It took over the coffee table for 5 whole weeks and my husband said that it felt like they'd been there for months!

And then, all 192 squares were completed and ready to join.

I laid out one row at a time and had great fun arranging the sequence of the granny squares. I used a simple dc seam which I crocheted along the back of the blanket.


This was my last row.

And then I turned the blanket and started joining the verticals.

I crocheted in the ends as I went. And then I was finished and all those little squares were all fastened together and looked like the beautiful blanket that I had imagined it would be.

I used the citron to edge the blanket. To be honest I debated long and hard about whether or not it would look too bold but it actually ties the whole blanket together very nicely.

I flipped the blanket, wet the edges and pinned it out. I didn't worry about the individual squares because they had a nice puffy look which I wanted to keep. I think by joining them with the dc seam it held them in shape nicely.

The usual blanket in the tree picture haha! I'll apologize in advance for all the photos that are coming but I truly love this blanket, and I'm so proud that I persevered and was able to create something so beautiful.


I'm really happy with how well all of the colours work together and the border finishes the blanket off nicely. I tell you it was so difficult to give this away, even to a deer friend. D tells me to just make another one for myself but I really feel like I don't have the energy right now. I'm very happy to look over all the photos that I've taken and maybe one day I will make one for myself. I think it would look perfect on our bed, but I don't want to guess at how many squares it would take to make that haha!

I also bought my friend these Sapphire ear-rings to go with the blanket. At age 69 she recently got her ears pierced, which makes me smile every time I think about it.
I hope you enjoyed all of my pics.
Have a great week.
Xxx

Wow Lady!! This is Magnificent and you should be soooo proud you managed to get her finished. I adore this pattern and will be making a sunshine day blanket in the very near future too. xx
ReplyDelete